ActiveCampaign
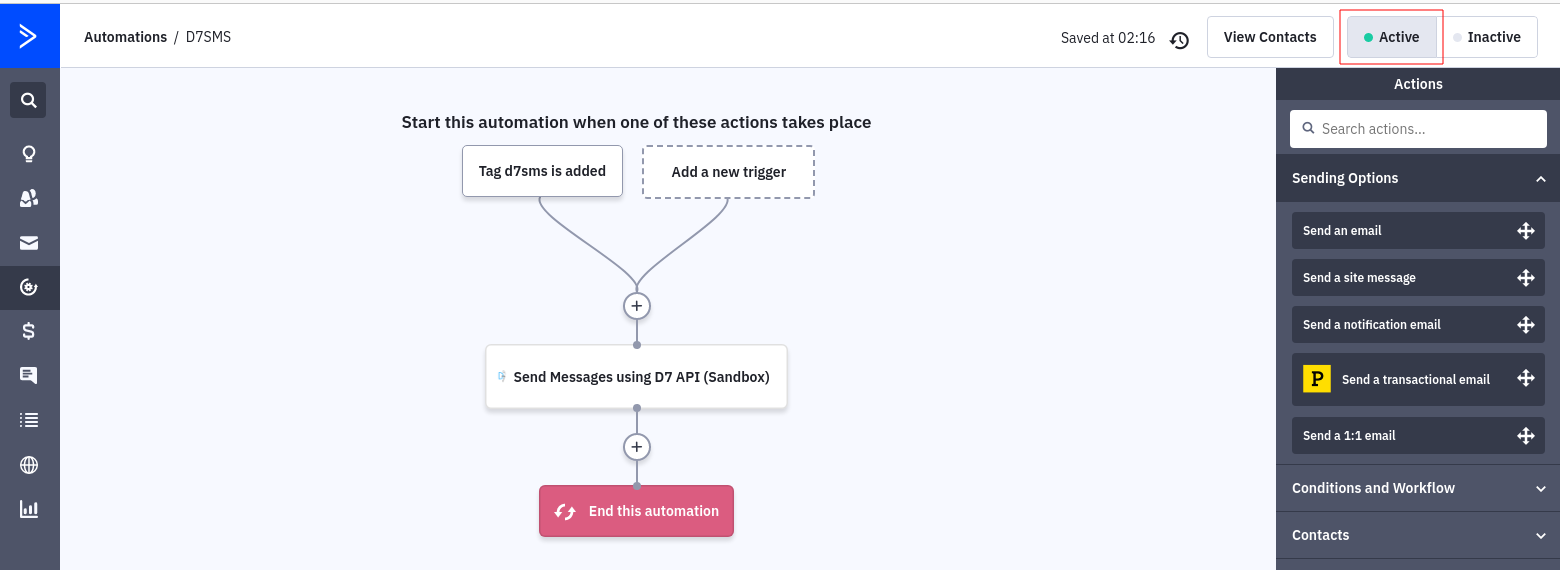
This integration allows you to send SMS messages to contacts from ActiveCampaign using the Send SMS Message using D7SMS automation action.
Requirements:
- ActiveCampaign account
- D7SMS account (You can also use trial account without a purchase)
- Positive balance on D7SMS account
Notes:
- This automation action sends outbound messages only. For tracking, replies, reporting, and billing, please check D7SMS account
- Messages sent with this automation action will be sent to contacts who (1) reach this step in your automation and (2) have a mobile phone number stored in the standard ActiveCampaign phone number field.
- Messages sent with this automation action have a 700 character limit. This includes field values for any personalization tags you use in the message.
- The recipient's phone number should have a country code prefix. You can also set the default country here, and all your messages will be prefixed with the selected country code..
How the D7SMS app works on ActiveCampaign:
-
Generate D7SMS Token -
Create automation on ActiveCampaign -
Connect to your D7SMS account -
Configure Message Content, Source address and Message encoding -
Enable/Activate Automation
1. Generate D7SMS Token:
D7SMS connection uses OAuth 2.0 based Bearer token authentication and you can create this token at the developer section of app.d7networks.com
Following are the steps by step instructions to create the token:
- Signup with app.d7networks.com
- Navigate to app.d7networks.com/developer/applications
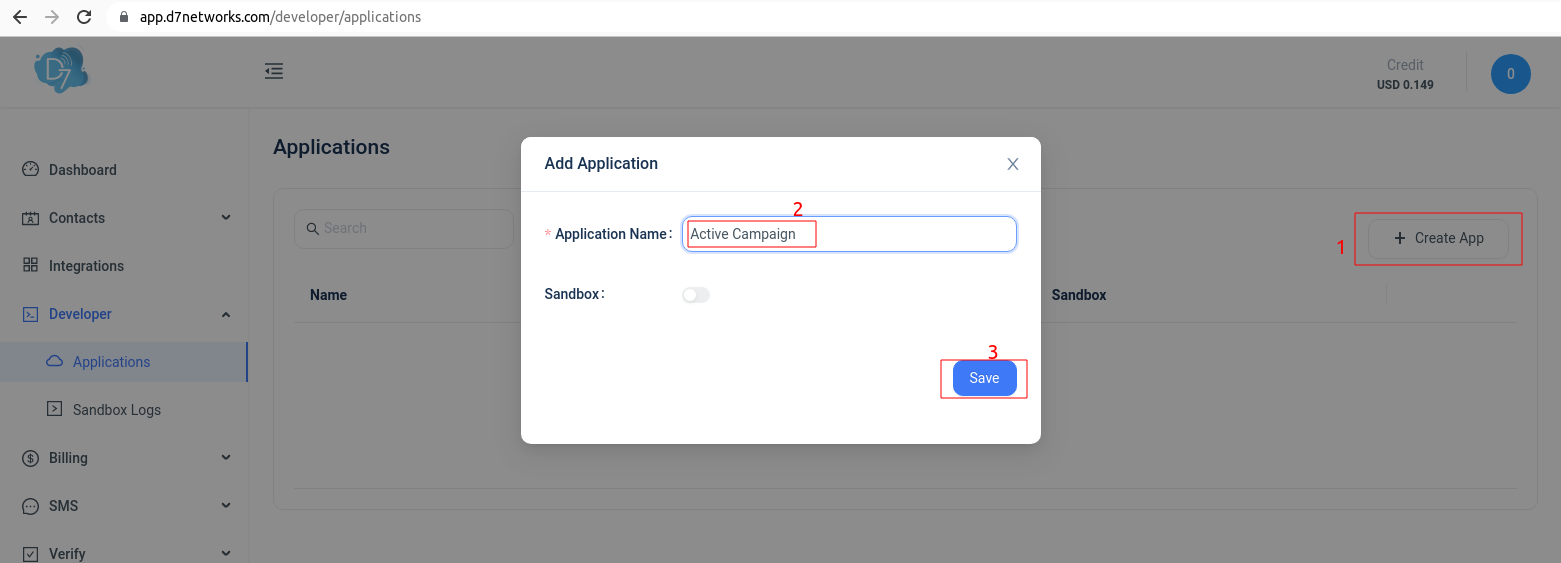
- Click on "Create App"
-
Enter an Application Name and "Save"
-
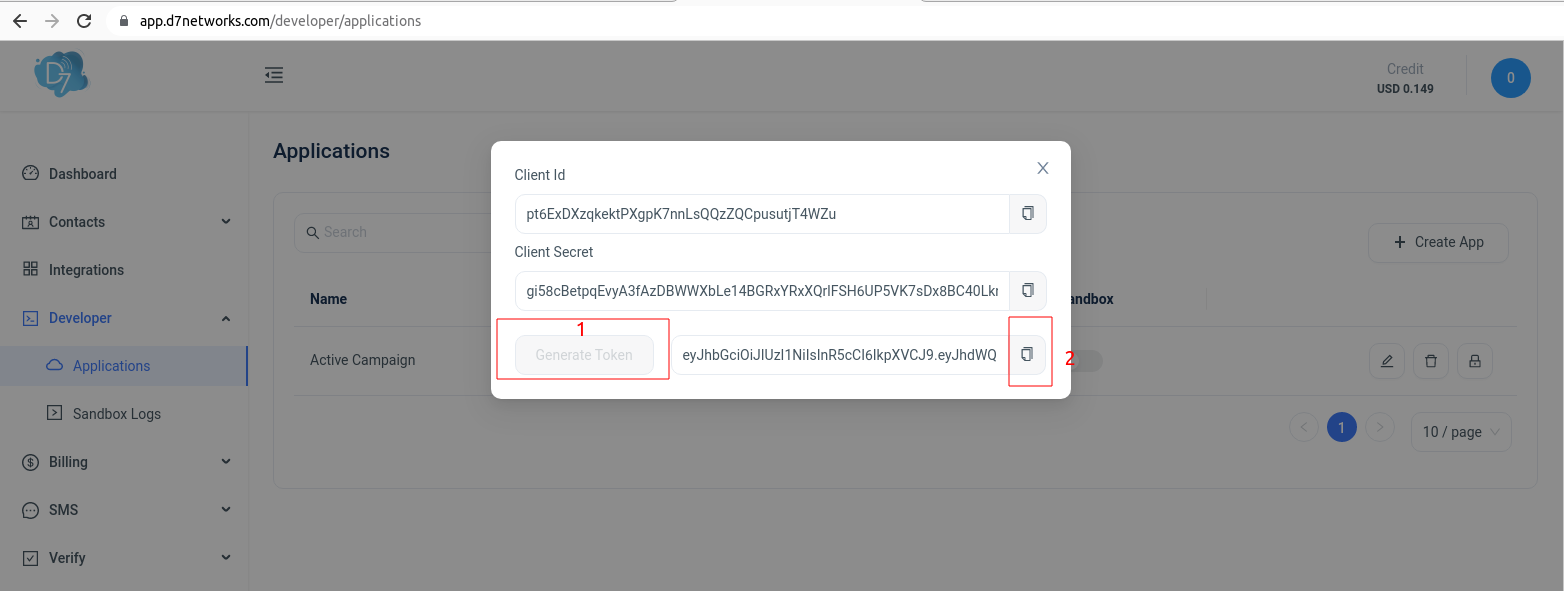
On the next window click on "Generate Token" and copy the token generated.
2. Create automation on ActiveCampaign:
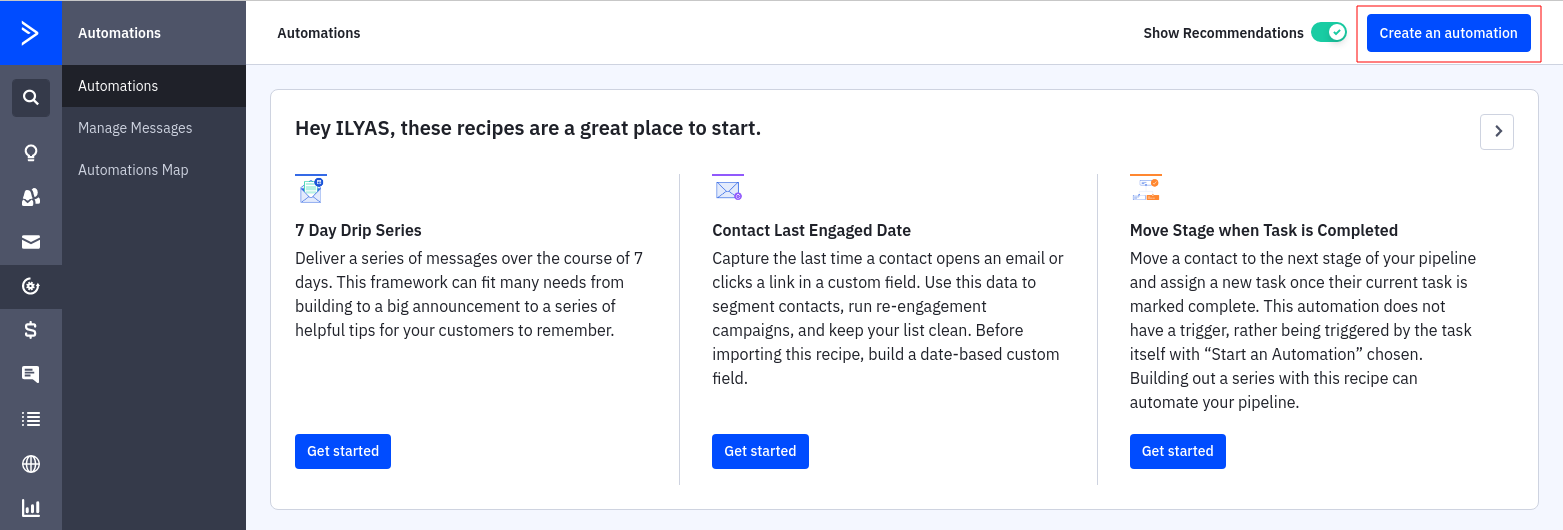
- Log in to ActiveCampaign account and Navigate to "Automations"
-
Click on "Create an automation"
-
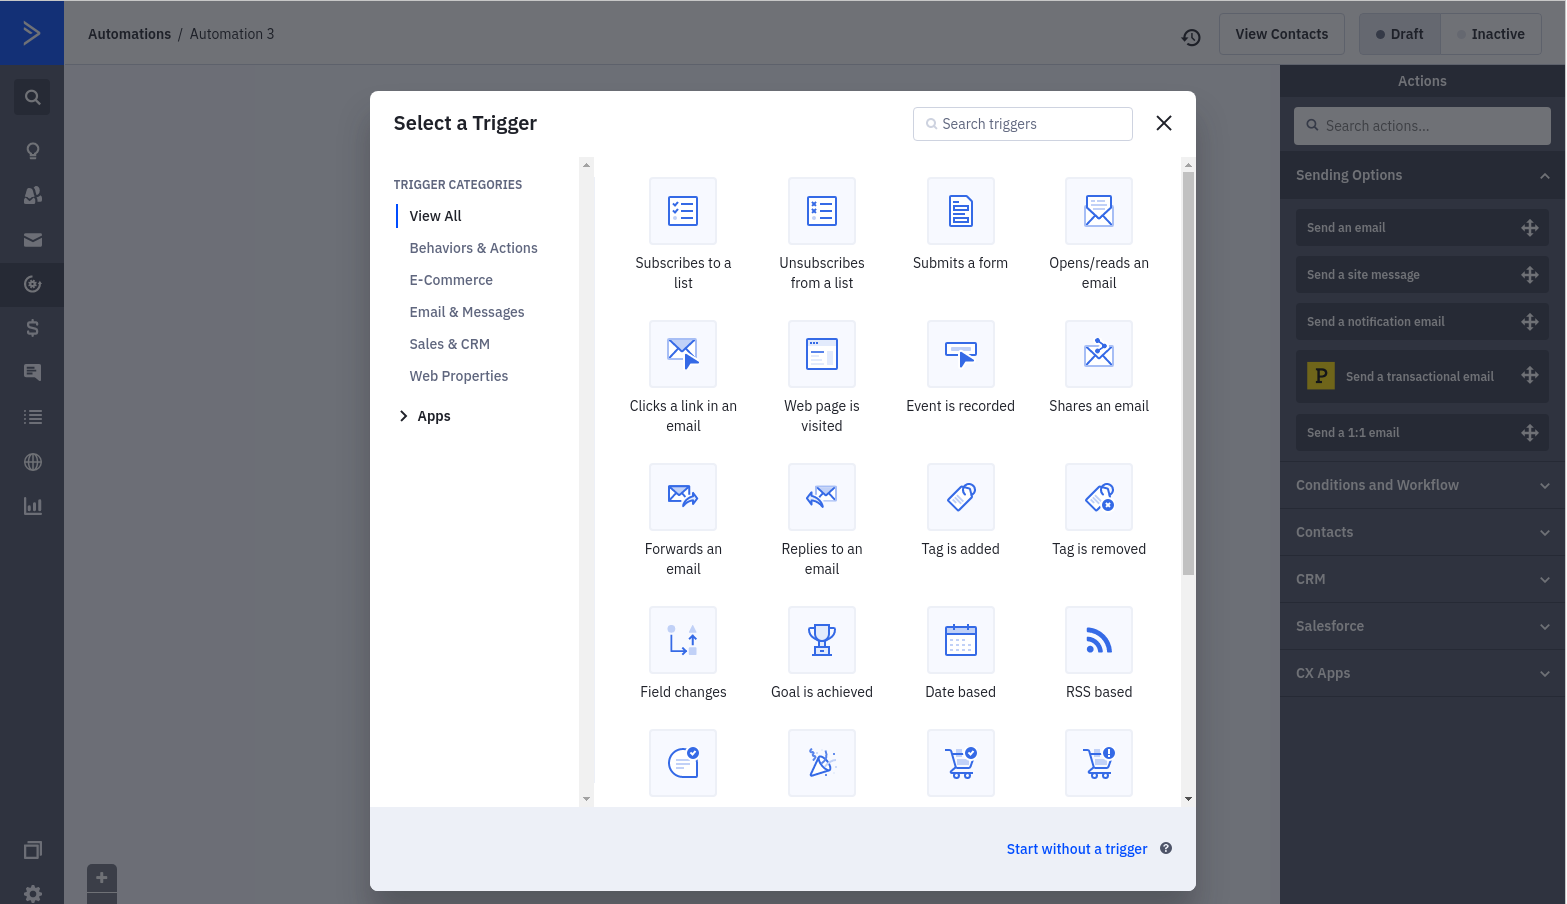
Select Triggers as you wish
-
Choose "Action option" ‘s

3. Connect your D7SMS account:
-
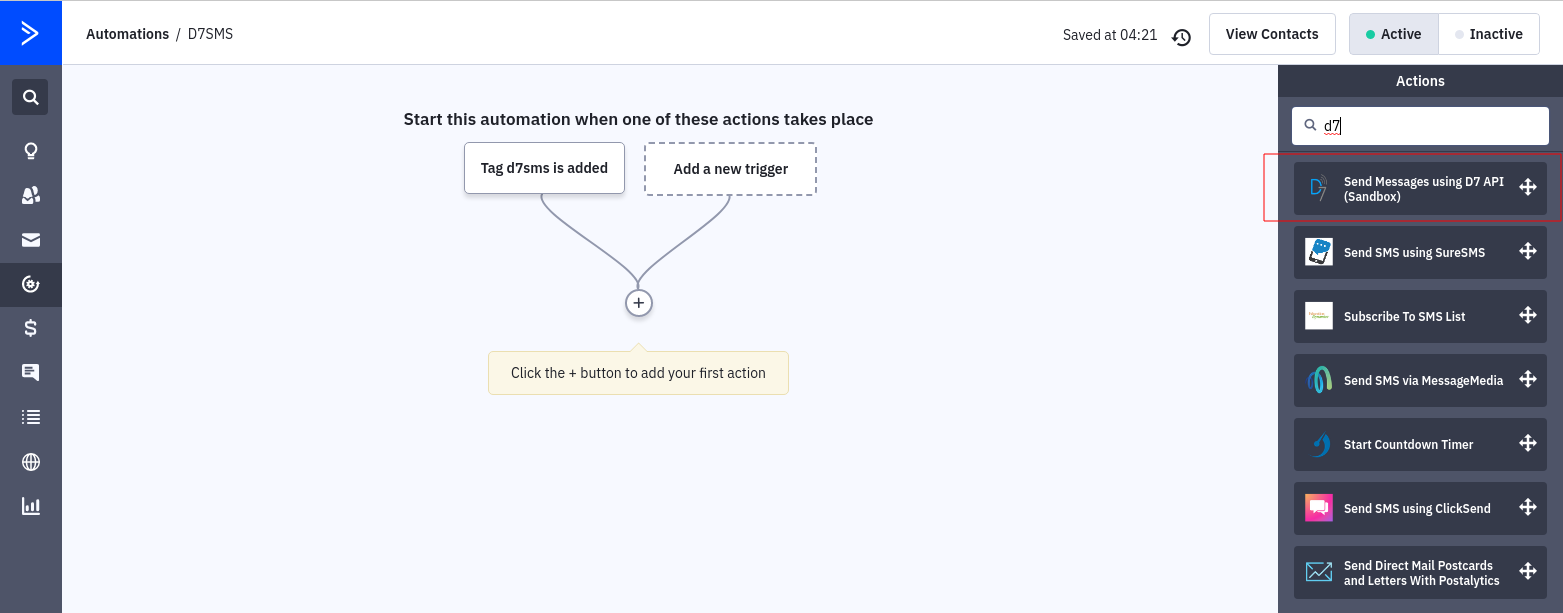
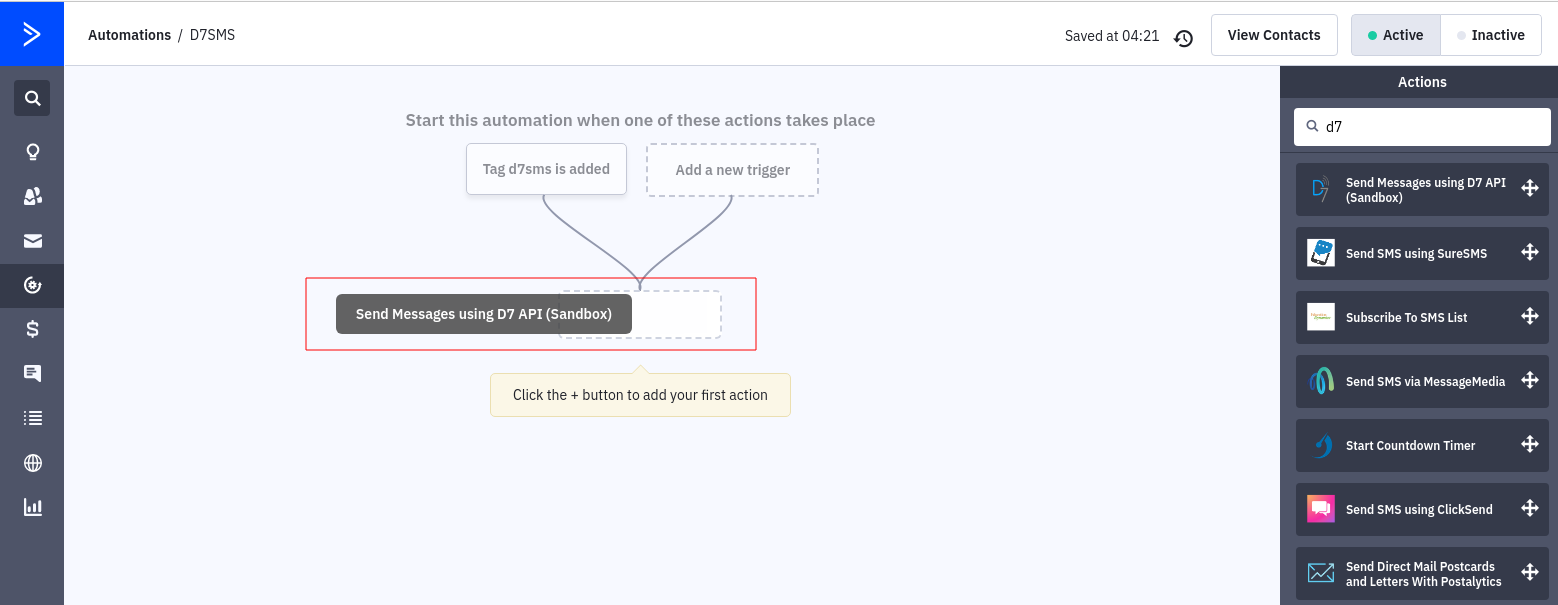
From your automation, click "CX Apps" in the right menu and select "Send SMS Message using D7SMS" action and drag it to your automation.
-
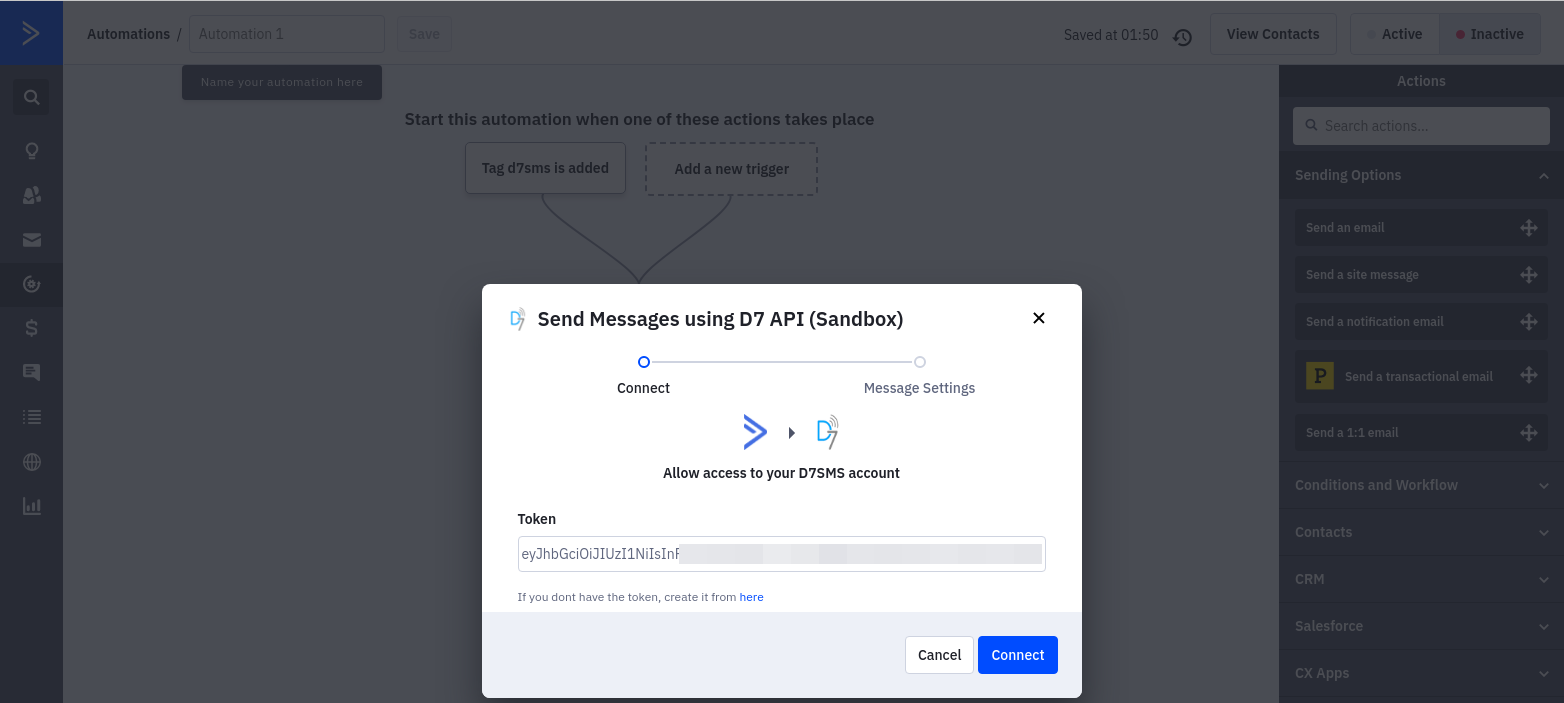
Enter D7SMS Token which is generated earlier
-
select the account
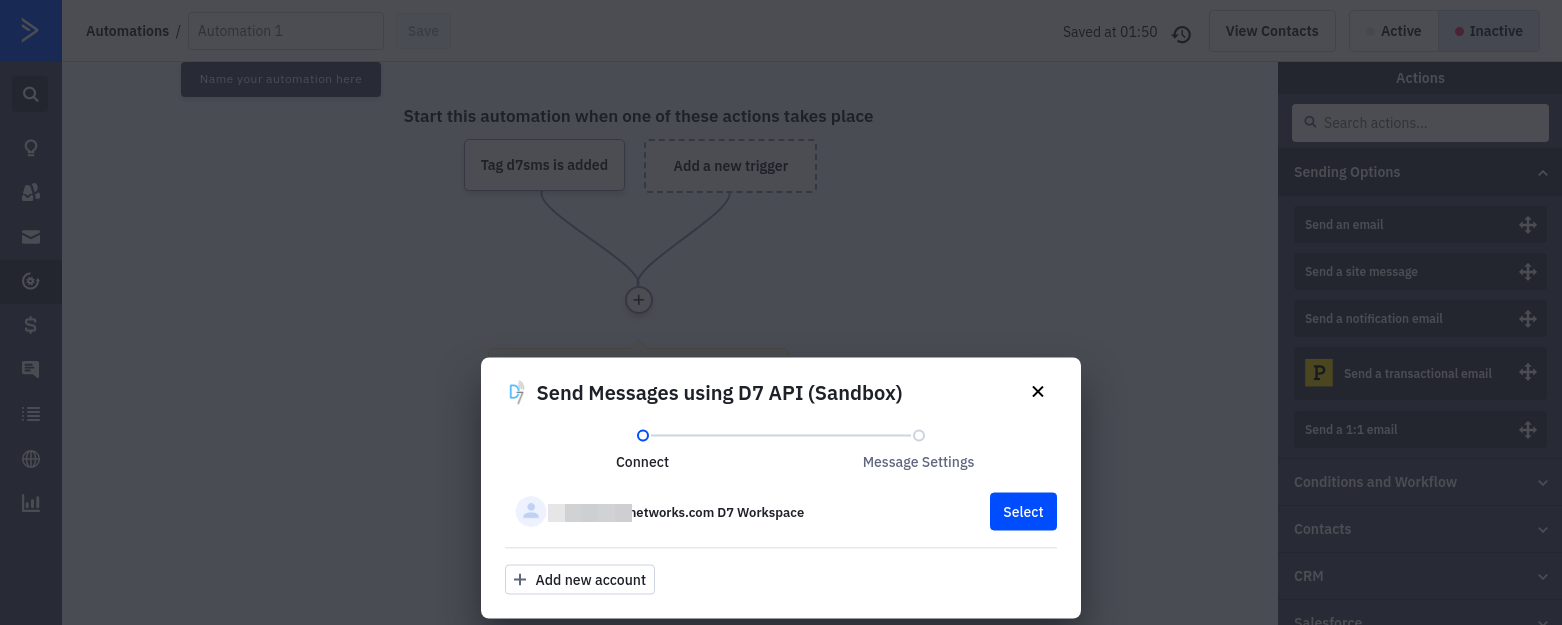
4. Configure Message Content, Source address and Message encoding:
-
Configure "Message Content"
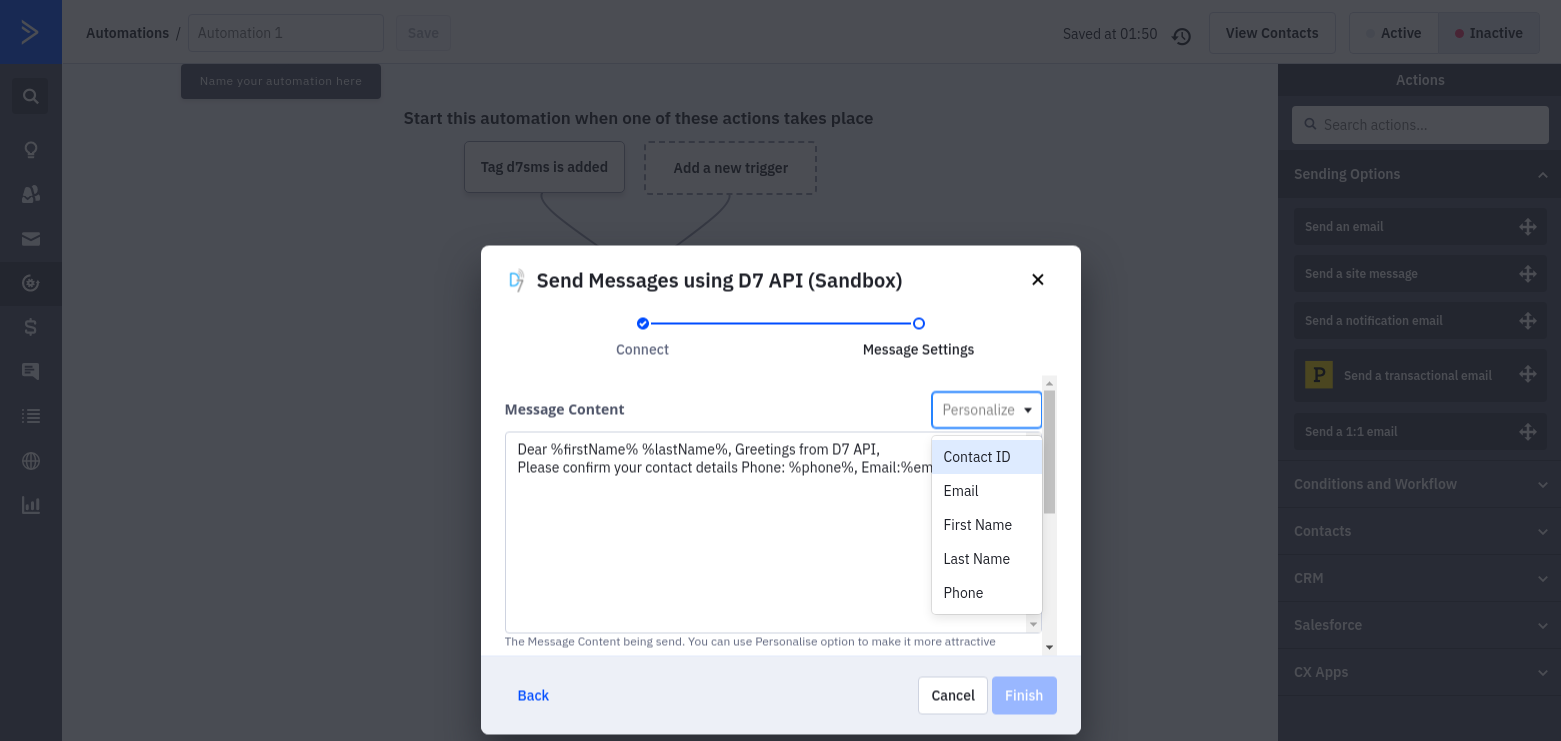
-
Configure "Originator" and "Data Coding"
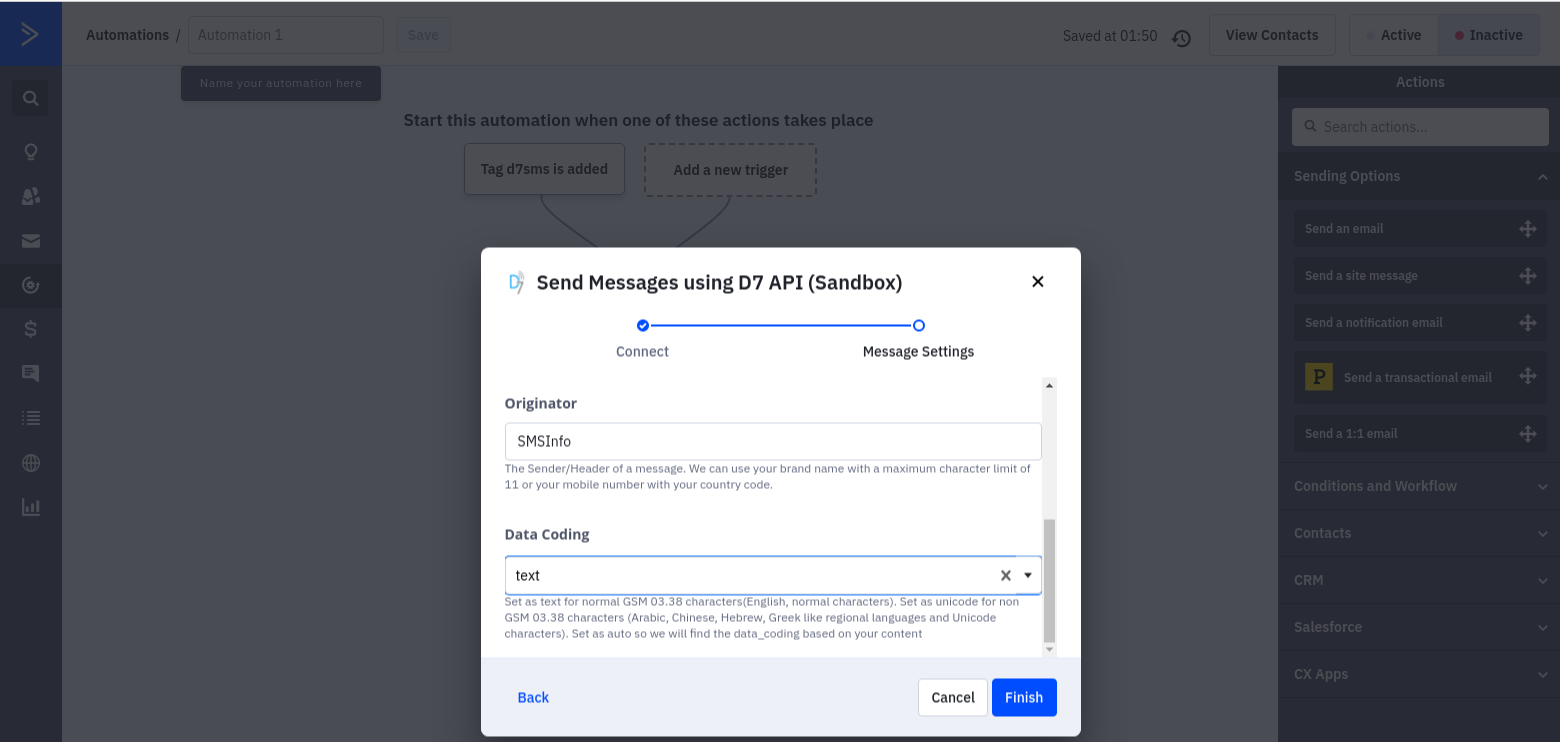
5. Enable/Activate Automation
- "Activate" automation
